
Plants have been designed to stay in one place their entire lives. So, transplanting hydrangea is bound to cause some problems, and transplant shock is inevitable.
How to reduce transplant shock for Hydrangea?
There are some things you can do to reduce the transplant shock that a plant experiences.
#1. Don’t damage the root system
When you are transplanting your hydrangea plant, be very careful that you do not damage the root system of the plant. Do not stand too close to the plant while digging it up. Stand back at least 1 to 2 feet away from the center of the plant.
When you take out the plant, the root system should have a large root ball. Let the roots remain covered with soil. Do not shake off the soil.
A lot of people suggest putting the roots of the plant in water for a few hours before transplanting it. However, do not do that. Soaking the roots in water will wash away the soil that covers the roots and the roots might get damaged.
Also, make sure that the soil on the roots does not dry out. Plant the hydrangea in a new location as soon as possible.
If for some reason, you cannot transplant quickly, you can keep the root ball moist with some water. do not use too much water.
Also remember that the longer you keep the plant outside, the less the chances it will have of taking root in the new soil.
While planting, take care not to compact the soil too much, as it can damage the roots.
#2. Keep the hydrangea in the shade
After transplanting, do not keep the hydrangea in full sunlight. Too much sunlight can cause the leaves of the plant to wilt.
After the transplant, the root system is not able to provide enough moisture to the leaves. On top of that, sunlight evaporates whatever moisture is present in the leaves. This causes the leaves to turn yellow and wilt.
That is why it is important to keep the hydrangea in full shade. You can create shade by placing a garden umbrella over the plant. You can also use a garden net held up with some frames to support it.
The hydrangea should be in shade for at least a month after it is transplanted. You can take off the shade once you see new growth.
However, if the plant does not react well to the shade being removed, you can put it back on until the end of the season.
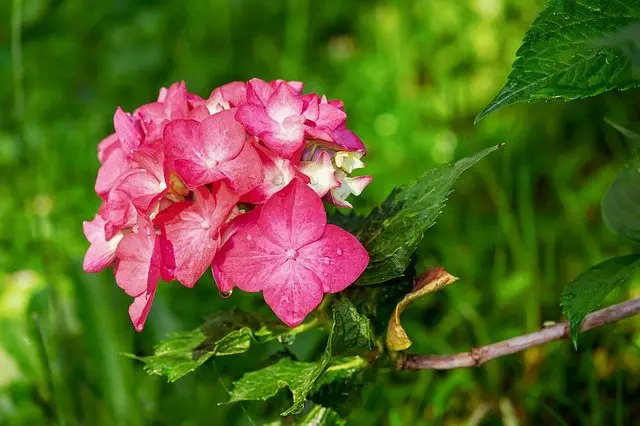
#3. Remove all flowers
Flowers require a lot of energy on the part of the plant. During the flowering season, plants spend most of their energy on the flowers, paying little attention to the other parts.
Hydrangeas too spend a lot of energy on creating seeds for the flowers. This makes the other parts weak. If you decide to transplant during the flowering season, it makes it even more difficult for the plants.
So, if you are planning to transplant hydrangeas, do so before they start to flower, in early spring. But if you have to do it during the flowering season, make sure you remove the clusters of flowers on the plant, even if they haven’t fully bloomed.
Cut the stem just one inch below the flowers. You might not get any flowers for the season, but the plant will benefit greatly. It also might bloom again after 1 or 2 months.
Check out How to revive dying hydrangea – Read here
#4. Don’t prune the hydrangea
It is believed that pruning hydrangeas after transplantation is better for the plant. But that is not the case.
It is true that after pruning some of the leaves, the area of moisture is reduced, but the plant experiences a lot of stress as well. If you prune more than 1/3rd of the plant, it can even die.
The foliage of the plant is also responsible for the development of the root system. Plants produce young leaves and branches.
Then the roots of the plant develop according to the proportion of the size of the plant above the ground. The more leaves on the plant, the bigger the roots will be.
So, avoid pruning a hydrangea directly after transplanting.
#5. Proper watering
It is very important that you water the plant properly, especially after transplanting.
Right after transplanting, you will need to water the plant much more frequently, as the soil will soak all the water faster.
After that, check the moisture in the soil and water it when it is more than half an inch dry. If the weather is cloudy, you will need to water once a week. If the weather is dry, you might have to water every 2 to 3 days or more.
Do not water in rainy weather. The amount of water you give to the plant should be proportional to the size of the plant.
Too much or too little water can cause problems.
#6. Mulch the plant
Mulching can be good for the roots of the plant, especially after transplantation.
Because of the mulch, the surface around the plant will dry out much slower, and you will have to water it less frequently. Not only that, the soil will not get too hot during the summer season.
The mulch should be at least 1 inch thick, but not more than 2 to 3 inches thick. If the layer of mulch is very thin, it will not be able to cover the soil properly. On the other hand, if it is too thick, it might block out air.
Do not cover the stems with mulch. You should mulch an area of at least 6 feet around the shrub.
The best mulch for hydrangea is compost and pine bark. Make sure you use a good quality of compost to mulch the area.
#7. Use rooting hormones
Rooting hormones are chemical compounds that help the plant in creating a rooting system.
Rooting hormones are important for plants that are valuable, or when there is a risk of losing the plant. Some beneficial fungi also have these compounds that help the plant.
There are a lot of products available in the market that help in rooting. There are powder and water-soluble rooting hormones that work better on hydrangeas.
Just sprinkle some powder in the hole before you transplant. Also, sprinkle some powder on the root ball of the hydrangea.
After transplanting, water the hydrangea every once in a while with a water-soluble rooting hormone. Rooting hormones help the plant a lot in the beginning stages.
#8. Mist the leaves
It is a good idea to mist the leaves while transplanting hydrangeas. Keeping the leaves moist will ensure that less water is evaporated and the leaves do not become dry.
Keep the hydrangeas in shade using a garden net and wet the leaves. While watering, pour some water over the garden net so that the net remains wet and creates a humid atmosphere around the plant.
Make sure to mist the leaves for only up to a month after transplanting, not more than that. A moist atmosphere can lead to fungal diseases that can damage the leaves.
Also, only mist the leaves if the climate is dry. If it is already humid or rainy, you do not need to moisten the leaves. Also, do not mist the leaves more than twice a day.
#9. Use fertilizers rich in phosphorous
The three most important nutrients for plant growth are nitrogen, potassium, and phosphorous. Nitrogen helps in the growth of leaves and foliage. Potassium is responsible for forming the branches and the trunk of the tree.
Phosphorous is important in the formation and development of roots. The more phosphorous you provide to hydrangeas, the stronger the roots will become.
Using a slow-release fertilizer high in phosphorous content would work best for a transplanted hydrangea, as it will release the nutrients regularly in the right quantities.
You should avoid using nitrogen-rich fertilizers during this time, as it will lead to the quick growth of leaves, which the plant won’t be ready for, resulting in the leaves wilting away.
What is a transplant shock?
When a plant or tree is recently transplanted, it can cause stress to the plant.
The plant may fail to root well in the new soil. As the plant has been recently transplanted, the root system may still be weak. Not just that, the plant may also not be very well hydrated.
Such stresses keep the plant from functioning properly. This is called transplant shock.
The hydrangea can experience transplant shock if the roots of the plant get damaged in the process, or if it is transplanted at the wrong time.
How to cure transplant shock?
While you may not be able to completely cure a hydrangea of a transplant shock, there are some things you can do to minimize the damage.
Add some sugar
Some studies show that adding a weak solution of sugar and water to your plant after a transplant can help the plant recover more quickly from a transplant shock.
If you use the solution while transplanting, it can also help prevent transplant shock. This technique may not work with all plants, but it does not have any side effects, so it is worth trying.
Trim the plant
If your hydrangea is in shock after the transplant, trim the plant. Trimming the plant will allow the plant to focus its energy on the roots first. Cut no more than 1/3rd of the plant.
Wait
Sometimes, a plant only needs time to recover from transplant shock. In that case, wait patiently for the plant to recover, while caring for it as you would always do. It will go back to normal in a few days.
How to transplant the hydrangea plant?
Firstly, dig a hole in the place where you want to replant your hydrangea.
Do this step first because it is best if you do not leave the roots of the hydrangea out and exposed for a long time.
Dig out your hydrangea. Be careful while digging it out. Dig in a circle around the hydrangea and make sure not to disturb the roots. Dig out as much of the root ball as you can.
Carefully move the plant to your new location.
If you are transplanting a hydrangea when it is in its dormant stage, make sure you water deeply. If it is the spring season, just water as you normally would.
Make sure your hydrangea is hydrated sufficiently, especially in the first two seasons after transplanting. Do not let it get dry.
Hope these tips help you while transplanting your Hydrangea. Happy Gardening!
